

 1974 Chevrolet El Camino |
|||||
| |||||
|
|
This is my very first car. Most people will start with something a bit smaller, but hey
I knew what I wanted... It would be big, nasty and V8 powered! When looking for my first
car I shortly concidered taking a Ford Ranchero, but due to the fact my hometown had an
official Chevrolet dealer, we thought it would be better to take a Chevy (for parts and
stuff).
Unfortunately I don't have many pictures of the car in the condition I bought it. The
picture beside is taken when I had the car for about 5 years. Lots of work had already
been done to the car. (I should have bought an other car, AARRGGHHHH)
|
||||
|
After driving the car for a year or so, I decided that it would be nice to make the
exterior look a bit better. A good friend of mine used to paint bikes (HD mostly)
and opted to help me out and get the car repainted in a few weeks of my holiday.
When started we found out that most of the lowest 15 cm's of paint was held in place by
bondo... So some minor (!) patchwork had to be done.
Well, the good thing 'bout this is that I got quite skilled in patch work on old
cars... As the weeks went on, holiday was over, and the car far from ready for painting. Eventually the car had to leave my friends premises, and was stored in my workshop for some months, waiting for the spring and summer to restart the painting. Than the sh#t hit the fan, and we were forced to leave our workshop, and I didn't have a place anymore to work on the car. Luckily I could rent a garage large enough to store it. After a year and a half or so we were able to get our hands on a new workshop, YES! On the picture beside, we are hauling my 'beauty' to it's new location. |
|
||||
|
|
Finally in it's new location it was parked on my carlift. Where it stood for about a year without any TLC... |
||||
|
Then finally I got interested in the my Camino again and started working on straightening
of the body. When the body was "good enough", I sprayed it with a fresh layer of primer for it's
final sandblocking. At first the paint scheme would be simple, an original Chevy dark green pearl. Maybe even with pearl white racing stripes. But for some reason, when things got moving on the sanding, I thought a more flashy design would be better. So we took some pictures of the car in to a computer, and started making several mild and wild designs. Below are a few of the better (?) designs we came up with: |
|
||||
|
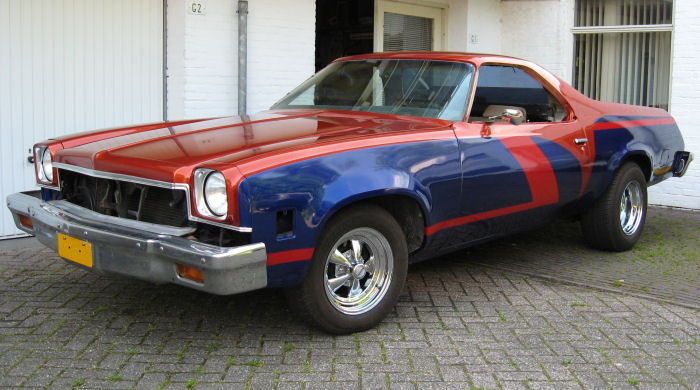
|
This final design has been the one that I've applied on the body last year. Recently a carpainter sprayed it with 3 thick layers of clear coat for me. Now the car is (again) waiting for it's re-assembly... |
||||
|
Finally my 406ci small block found it's way into the engine bay. |
|
||||
|
|
1 3/4" Headers and a full 3" exhaust will definitely benefit it's breathing capabilities. Headers have been modified from flanges to slip joint. |
||||