


 |
|||||
|
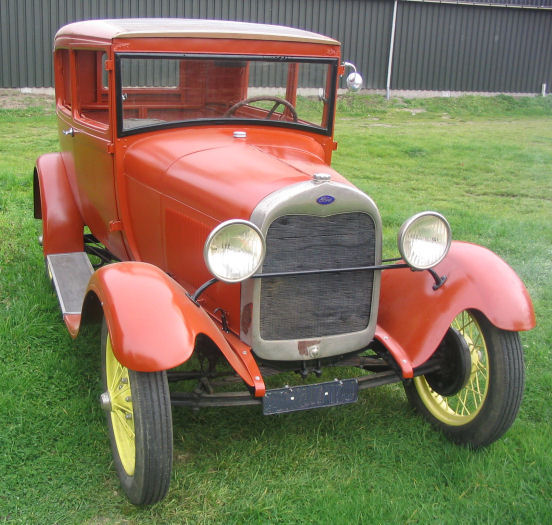
1928 Ford Model A Click here to see a first design we made to turn this Ford into a nice little Hot Rod. |
|||||
| |||||
|
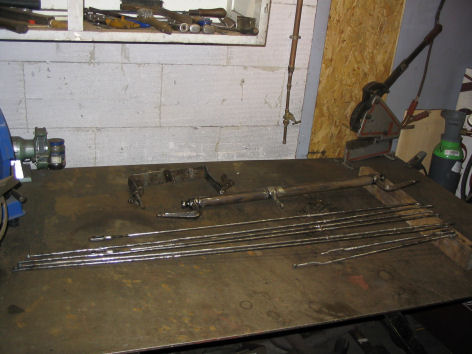
Work has started on the car. First the mechanical brake rods have been cleaned, refurbished and painted black. Most of the holes at the end of the rods had worn out, now the holes have been welded shut and re-drilled. The the rear leaf spring was removed from the frame to be cleaned and grinded smooth (the leafs had dug into eachother). After this the spring was painted black and re-assembled with plenty of grease. With the spring out of the way, it now was a good time to completely clean the frame and driveline, so it could be painted black as well. |
||||
|
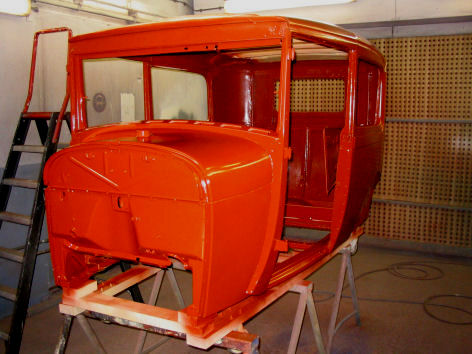
This is how the body looks now after 2 layers of 2-component epoxy resin (color oxide red, RAL3009). One of the previous owners has had the body media blasted, but the did a terrible job... Instead of blasting to the bare metal, they just removed the layers of paint and left large chunks of bondo on, and then directly applied some ugly colored primer. So I had to sand the complete body again before the new primer could be applied. During this job I also found out that the passengerdoor was poorly repaired, and had some 10mm of filler to the door skin. This filler came off nearly in one piece... Thanks to M@ik the sanded body could be transported to the paint booth in style! |
|
||||
|
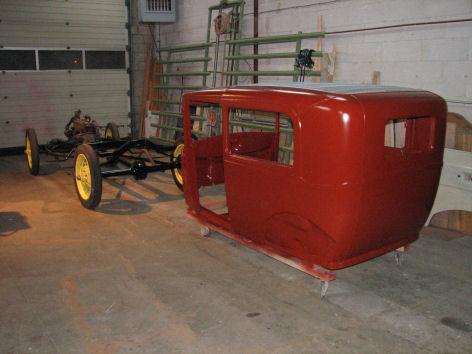
With the body back from the paint booth it was time to re-install the rear spring, and put the frame back on it's wheels. Now the body could be put back onto the frame again. When I did the hard and dangerous job of loosening the bolts holding the body to it's temporary (wooden) frame, a couple of good friends lifted the body and placed it on the frame. Many thanks guys! |
||||
|
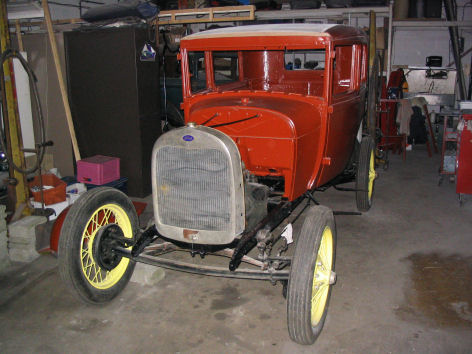
After mounting the of the radiator and grill shell it suddenly started to look like a car! Mounting the fenders, running boards and steering column added to the overall look. The "wiring" (?) installed by one of the previous owners obviously had to go, and a new wiring harness has been installed instead. The carb got rebuild , the V-belt, distributor, rotor and sparkplugs replaced. So now it was time to fire up the engine. First we tried our proven method with brake cleaner sprayed right into the carb while cranking, but that didn't work this time. Then the fuel system was completely connected and filled with fresh gas. With a few drops of fuel into each spark plug hole, the engine fired right up, and sounded great! Now that I got wood, it seemed a good time to make and fit new floorboards to the car. ;-) |
|
||||
|
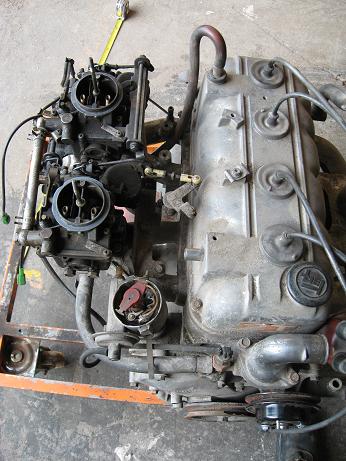
If all goes well this engine will be replacing the original one this winter. It has half of the displacement, but double the power of the original lump. And to top it off, the matching gearbox has an overdrive! For the performance and visual gain of it, carbs will eventually be replaced by 2 double side draft Dellorto's. |
||||